
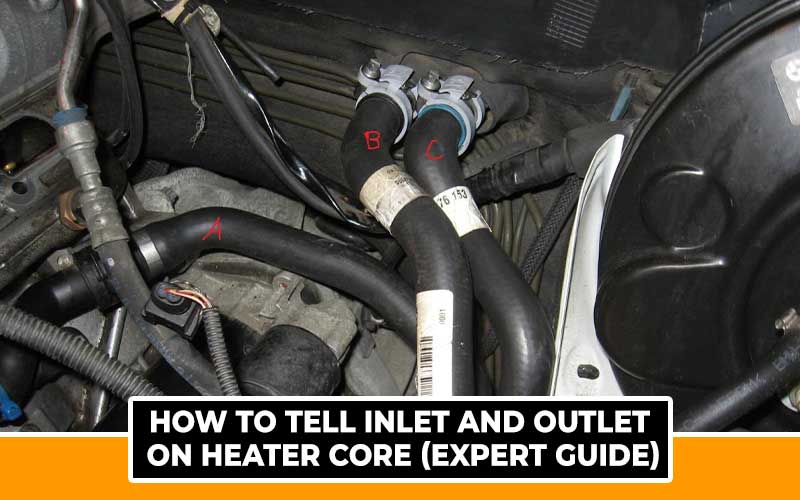
Most car owners do not know anything about the car’s heater core. The heater core is made up of pipes grooved with fins and takes the shape of the letter ‘S.’
Nonetheless, no sign exists to help differentiate the INLET from the OUTLET, which may be problematic for a vehicle owner to resolve because he knows no other means of identifying them.
Here, we will discuss a few tips that may help differentiate these pipes. This article can help vehicle owners know how to tell inlet and outlet on heater core.
In addition, this article also discusses the features and functions of the Inlet and the outlet pipes on the heater core. With all this being said, it is only fitting to get down to business.
What Is the Heater Core?
Before going into how to tell inlet and outlet on heater core, it is necessary to understand what the heater core is?
A heater core is a device that regulates the interior temperature of a vehicle keeping it warm. It can be compared with a radiator which acts as a car’s cooling system.
Meanwhile, the heater core does the total opposite of what the radiator does. The heat from the hot coolant is emitted into the atmosphere by a radiator.
On the other hand, the heater core passes out heat from the hot coolant using the vehicle’s ventilation system, which supplies it to the vehicle’s interior through a blower engine.
Also Read: How to Perform a Heater Core Bypass (Step by Step)
How to Tell Inlet and Outlet on Heater Core
- By Identifying the Path of the Hoses
- By Check the Control Valve on the Heater Core
- By Following the Rubber Hoses
It is usually not difficult to get confused by the Inlet and outlet pipes of the heater core, and thoughts of how to identify these two might be roaming the mind without an answer.
To differentiate them, you need to use your hands to feel them or a thermometer to observe their difference in temperature at their base. Push the control button responsible for heating the vehicle, Then;
As a necessity, the Inlet pipe will warm up first. Therefore, the temperature of the Inlet is usually higher than the outlet pipe.
In essence, the outlet pipes will have a lower temperature. With this observation, you can quickly identify the difference between these pipes.
Now, let us examine both pipelines, one after the other. Also, if the location of the heater core is not known correctly, it can be found just underneath the dashboard in the car’s dashboard compartment.
It is a heat exchanger made of copper piping with aluminum cooling fins.
1. Identifying the Path of the Hoses
When uncertain about which one of the heater core hoses is the Inlet, check for the one that goes into the water pump. You will likely see a valve controlled by heat on the inlet pipe.
The coolant within the pipe practically flows through three stages :
- From the inlet, the coolant is first moved throughout the heater core.
- The outlet line will go straight into the reservoir of the cooling system. Then it will enter the hot engine.
- From the hot engine, the pump will recirculate hot coolant back to the heater core.
2. Check the Control Valve on the Heater Core
A valve that controls the heater may be connected to the inlet hose to regulate the quantity of coolant that flows into the heater. Upon the coolant being passed into the heater core, an outlet pipe usually connects the cooling system reservoir or the radiator.
When the vehicle has a warm engine, increase the heat to a maximum level in a situation to identify these pipes. The hotter pipe is the inlet pipe that goes to the heater core from the water pump; immediately, coolant circulates all over the heater core, and it usually goes back to the engine’s cooling system (now more relaxed).
Again, increasing one’s knowledge of temperature and pressure relief valves may help.
3. Following the Rubber Hoses
In applying this strategy, differentiating the outlet from the Inlet can be less complicated. Trailing the rubber pipes is usually all that is done if this method is used.
First, a little metal pipe must link the plumbing system directly from the heater core before a rubber hose is then connected to this pipe.
Then the water hose moves from the upper region of the engine to the entrance of the heater core, where the heated coolant flows into the heater core.
The second pipe is always joined to a metal tube. This pipe goes to the front of the engine in a horizontal direction. Then, it links to the pump’s Inlet pipe before returning to the engine. This second pipe is usually the outlet of the heater core.
If close attention is given to how the Heater core is set up, it will be noticed that flow increases in the body. The warm coolant then moves to a point close to the bottom, while the colder coolant is released at the top of the heater core
Never forget that the pipe that leads to the water pump region of the heater is the Inlet. Nonetheless, these drain connections usually work using a single hose as they circulate throughout the cooling system.
The ‘outlet hose’ is what the second pipe on the vehicle’s heater core is called. This connection clarifies the distinction between the outlet and the inlet hose.
Check out this video for more tips on how to tell inlet and outlet on heater core
How to Figure Out if a Heater Core Is Clogged
The heater core removes the heat from the coolant. It is a component of a vehicle’s cooling system. The small tube is responsible for passing the coolant around and heating the car’s interior.
When the heater core of a vehicle is clogged, heat cannot be produced. This fault is the primary sign that will be noticed whenever the core is blocked. The blowing mechanism will work; however, only cold air will be felt.
Here, we will examine more signs that could be seen when a heater core is clogged.
- A cold coolant may be the primary reason a heater core is not working. When this is the cause of the problem, the vehicle’s interior will not be warm. Therefore, when you see that the radiator has a little coolant left, fill it up before using the car.
- If moisture or antifreeze can be perceived on the side of the passenger, this may be an indication that there is a leak in the heater core. An oily mist will also be seen on the windshield at this point. If these things happen, the heater core should be replaced as soon as possible.
- The most popular sign shown when a heater core is clogged is that the heat does not work when turned on. No warm air will be produced, even though the blower fan is working.
- An offensive fruity odor could also mean a heater core is clogged. The coolant does smell nice. Hence, when a pleasant scent is constantly perceived inside a vehicle, the heater core of such a vehicle may be leaking or might have clogged.
Also Read: Car Overheating When Idle (Causes & Solutions)
How to Unclog a Heater Core
To perfectly clean the heater core, it is vital to acquire the correct information and equipment. Fixing a clogged heater becomes easier once the right appliances are available with adequate knowledge.
A few directives on how to unclog a heater core are explained below:
Step 1
Firstly, differentiate the heater core’s inlet hose from the outlet hose. The firewall makes accessing them less complicated. However, if accessing proves to be an issue, the hoses can be traced to make sure it has no connection with the engine.
Step 2
Closely inspect the clamps and ascertain which one needs to be removed. A flat head or Philips-head plier or screwdriver may be required for this. Use the flat-head screwdriver to loosen the clamp, then twist the pipe till it becomes free of tension. After that, take it out.
Step 3
Suppose it is the case that the pipe got loose and detached from its joint. You need to get an extra line, then join it with whichever hose is detached, whether the outlet or the Inlet. Meanwhile, if the hose disconnected from some other point, locate where it separated from and put it back in position.
Getting a garden hose that has a built-in sprayer is recommended. Connect the sprayer tip to the end of the heater pipe. Then, turn on the garden hose and clean the heater pipes with water.
After rinsing, please switch to the other pipe and rinse it. Do this for a time till the water coming out of the hose becomes clean and clear.
Step 4
All air pockets should be removed. This step needs a coolant and water mixture in equal proportion to be on standby. Pick one of the pipes and fill it with the mixture. The lower pipe should pass out the fluid. As soon as this is done, re-connect the lower line and the others yet to be connected.
Step 5
Now, the process ends at this stage. Confirm if the heater core is working as it should. Next, fill the radiator with the water and coolant mixture.
To ensure overheating does not occur, check the temperature gauge. Lastly, confirm if the heater core is producing heat as it ought to.
Also Read: Charging System Failure (Meaning, Causes & Fix)
How to Replace Heater Core Hoses

- Open the vehicle’s hood and find the hoses connected to the heater core.
- Check these hoses for any indication of leakage.
- If there is no indication that the coolant has been leaking, run a pressure test on the system (when the cooling system and engine are excellent), then re-check if there are signs of leakage. While running the pressure test, ensure the system pressure limit s not exceeded.
- Once a leak is found, end the pressure test.
- Then, empty the cooling system.
- Remove the hose clamps, then take out the leaking pipe with caution.
- Replace the hose with a new set of clamps, and fill up the cooling system with a water mixture and antifreeze in equal proportion as recommended.
- Run a pressure test on the cooling system to know if there is a leak in any other place. If new leaks are discovered, have them repaired.
- Start the vehicle’s engine, raising it to an operating temperature. Then, leave the motor to cool off before the coolant level is rechecked.
- Put the radiator cap in place, then close the vehicle’s hood and test drive.
Frequently Asked Questions – How to Tell Inlet and Outlet on Heater Core
How do I know which hose is in the inlet-outlet heater core?
A valve that controls the heater may be connected to the inlet hose to regulate the quantity of coolant that flows into the heater. Upon the coolant being passed into the heater core, an outlet pipe usually connects the cooling system reservoir or the radiator.
What happens if you reverse the heater core hoses?
By switching the pipes, the coolant circulates in reverse order in the core but still flows through the same route in the engine. The reversal does not stop it from picking up heat from the heater core and supplying the vehicle’s cooling system.
Which hose is the Inlet on a radiator?
The hose connected to the upper part of the radiator passes hot coolant from the car’s engine to the radiator. It goes around the radiator, receiving a cooling effect from the radiator as it moves around. When it gets to the base, the lower hose returns the cooled coolant to the engine, and the cycle starts.
Which heater hose goes to the water pump?
The lower radiator pipe goes to the water pump. However, the hose attached to the upper part of the radiator is connected to the heater, and the thermostat, which means the outlet hose connects to the water pump.
Where does the heater hose connect?
The heater pipe is linked to the heater core and the water pump. As the warm coolant circulates through the whole heater core, the air is passed around the core via a fan, which makes the atmosphere of the vehicle’s interior warmer.
Conclusion – How to Tell Inlet and Outlet on Heater Core
This article explains a simple and precise directive on how to tell inlet and outlet on heater core.
Hopefully, this article gives adequate knowledge of where the heater core hoses are located and clarifies the confusion about identifying these hoses.
Moreover, before executing any maintenance procedure on your car’s heater core, it is required that the hoses are first identified and differentiated. So having the requisite knowledge on an issue like this is quite understandable.
Nonetheless, where it seems complicated to differentiate both hoses, even after following the guides provided, there’s no other option than to consult a professional to help solve this problem.